Planting Instructions for 4-Year-Old Blueberries in P9 and C1.5 Pots with a Root-Bound Root System
Author: Superborówka | 20.02.2026
Thank you for purchasing blueberry plants from our nursery. With 3–4-year-old plants grown for a long time in small containers (P9 approx. 0.5–0.7 L and C1.5 = 1.5 L), the root system is often...
1) Why this matters
A root-bound root ball forms an “armor” layer that prevents roots from growing out into the surrounding soil. As a result, the plant may stall, grow poorly, or dry out easily even with watering. Loosening the root ball breaks the circling pattern and stimulates new lateral roots that will expand into the soil.
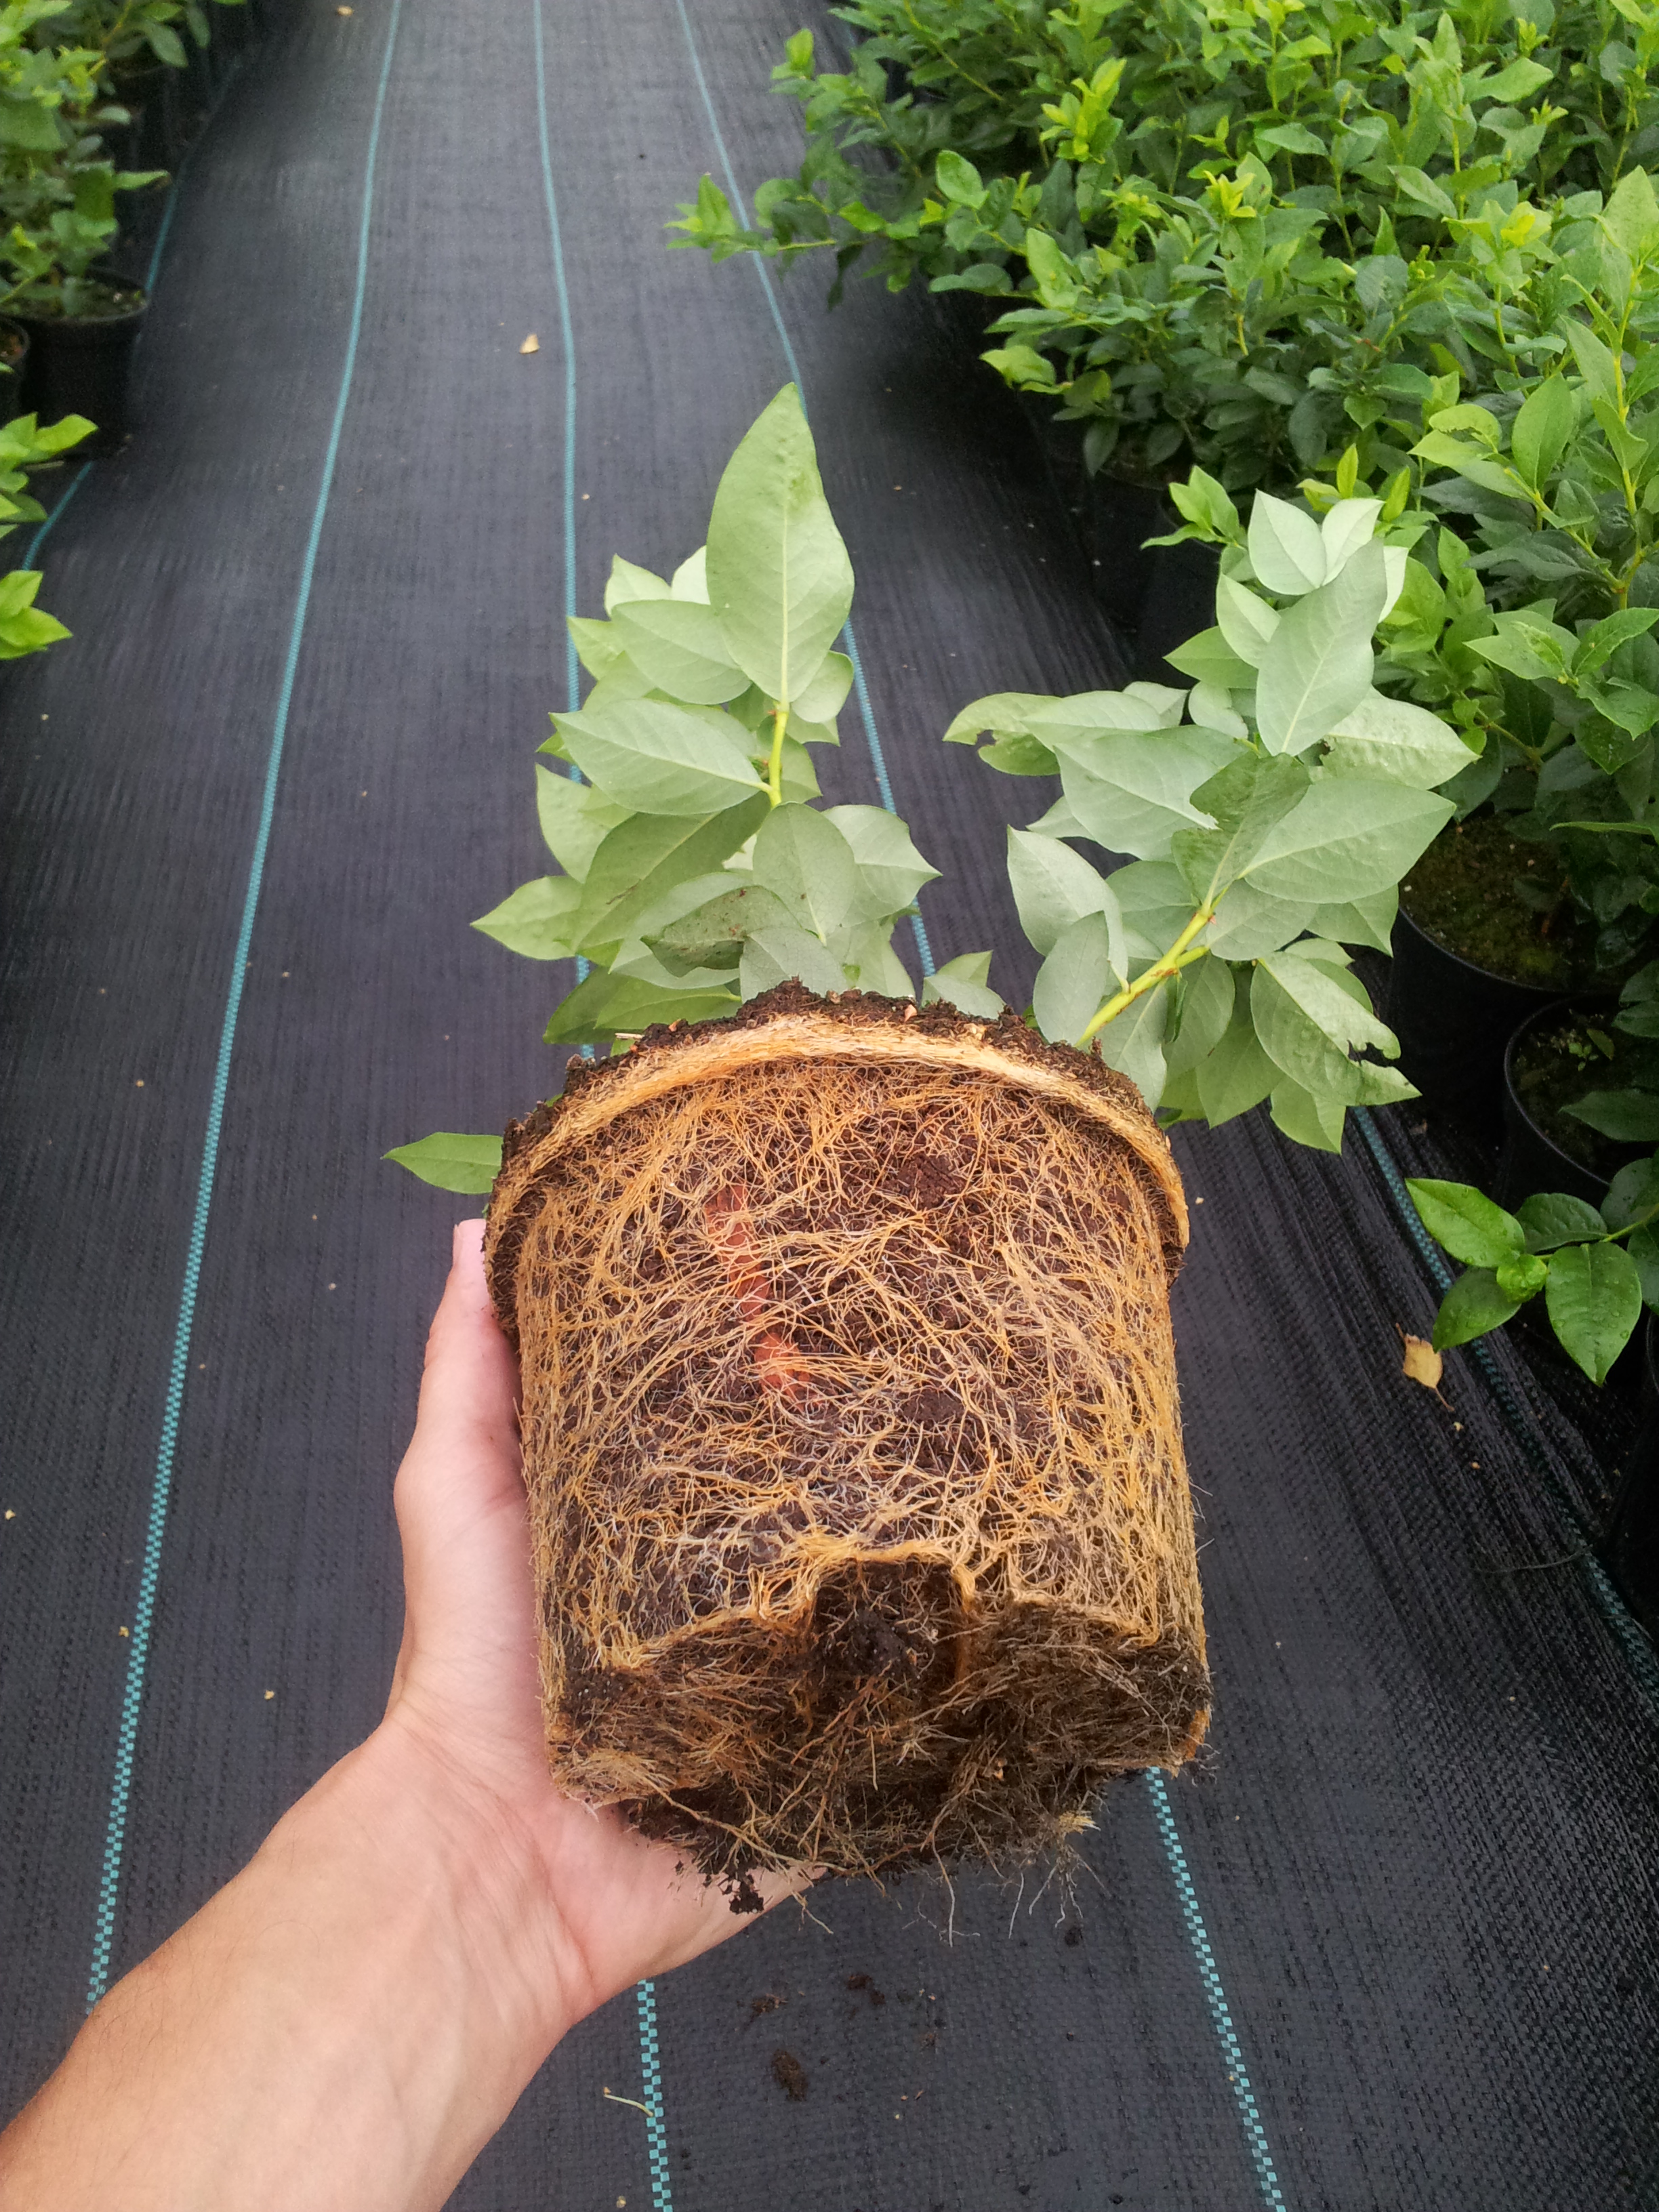
2 year old plant root system in C1,5:
3 year old plant root system in C1,5:

2) Preparation before planting (essential for root-bound plants)
Step A — Hydrate the root ball
-
Remove the plant from the pot.
-
If the root ball is dry, place it in a bucket of water for 5–15 minutes, until air bubbles stop rising.
(Do not soak for hours—prolonged soaking reduces oxygen in the root ball.)
Step B — Loosen the roots (the most important step)
Choose one method depending on how tightly bound the root ball is:
Method 1: Teasing/Combing (best method)
-
Gently tease/combing the roots around the outside of the root ball using your fingers or a hand fork, pulling some roots outward.
-
The goal is to break the dense root mat and orient roots radially.
Method 2: Vertical slits (fast and effective)
-
Using a clean knife, make 3–5 vertical slits around the root ball to a depth of 1–2 cm (P9) or 2–3 cm (C1.5).
-
If the bottom is tightly spiraled, trim off a thin layer from the bottom (about 0.5–1 cm).
Method 3: Combination
-
For very tight root balls: use slits + light teasing at the slit locations.
Note: Do not worry about lightly damaging some outer roots. This is a controlled practice that encourages new root growth.
3) How to plant (so the plant establishes and starts growing)
Site and soil
Blueberries require:
-
acidic soil: pH 4.0–5.2
-
a well-drained, organic-rich growing zone
-
consistent moisture, without standing water
If you have heavy/clayey soil, plant on a raised bed/ridge or create a wide amended planting strip.
Planting hole and depth
-
Dig a hole at least 2× wider than the root ball.
-
Plant at the same depth as in the container (no more than 1–2 cm deeper).
-
Firm the soil gently to eliminate air pockets.
Watering and mulch
-
Water thoroughly right after planting so the entire root zone is saturated.
-
Apply mulch (pine bark/sawdust/acidifying mulch) at 5–8 cm depth (do not pile mulch directly against the base of the stems).
4) Water management after planting (the most common cause of failure)
For the first 3–6 weeks, the roots are still expanding out of the original root ball. During this time, keep moisture consistent:
-
water more frequently, but avoid waterlogging
-
do not allow the root ball to dry out (peat-based root balls are difficult to re-wet once they dry)
-
drip irrigation or regular watering targeted to the root-ball zone works best
5) Fertilizing after planting
-
Avoid strong fertilization for the first 2–3 weeks (the plant must rebuild active roots first).
-
Use fertilizers formulated for acid-loving plants; apply small doses more often, preferably after watering.
-
If possible, monitor pH and salinity (EC) in the root zone.
6) Signs the root ball was too tight and not loosened
If after 3–6 weeks the plant:
-
produces no new shoots
-
wilts despite watering
-
has small leaves or poor color
-
appears to “sit still”
— the most common reason is that roots have not expanded beyond the original root ball. In future plantings, be sure to loosen or slit the root ball.
7) Quick checklist (for busy growers)
-
Soak the root ball for 5–15 minutes.
-
Make 3–5 vertical slits + lightly tease the outer roots.
-
Plant at the same depth, water thoroughly.
-
Mulch 5–8 cm.
-
Maintain consistent moisture for 3–6 weeks.